The last four weeks were craaaazy pack.
Firstly, I was "forced" to attend a two weeks audit training and exam which actually was a 3 weeks program because the one week "off" in between was actually spent compiling the audit report.
My hesitation (that's why felt "forced") about attending the training was because of the "exam" at the end of the training.
I am soooooo terrified of "exam"!!!
In the end, I actually enjoyed the training, learned lots of things and made some friends.
Now, waiting for the exam result - I am hoping for the best.
Also, busy catching up with the last 3 weeks work.
Duh!!
That aside, I hope to embark on more wire jewelry projects this weekend - finishing off commissioned pieces and maybe write a new tutorial....mmmmm.....if I have the time.
Anyway, here's sharing my most recent sparkly Swarovski Crystal (4 mm - yeah tiny) bracelets completed early April but only managed to post now.
All wire wrapped with 24 gauge wire.
Looks good with lots of them together.
Have a great weekend and happy wrapping.
Friday, May 16, 2014
Wednesday, April 16, 2014
Wire Jewelry - Wire Wrapped Pearl Studs
Made a couple of these simple wire wrapped studs the other day. All of them are pearl studs of different sizes, shapes and colors.
If you'd like to make them yourself, which would take about 30 minutes or less of your time (for a pair), you can find the tutorial here:
At Etsy, click *here*
 |
| The oblong/teardrop shape pearls really look pretty with this wrap. |
 |
| A bit of modification to the top of the earring - added a small loop. |
 |
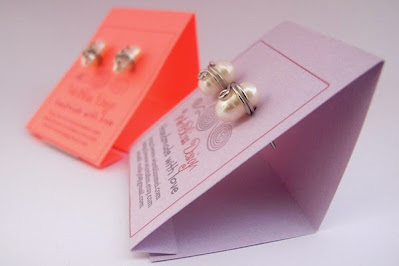
| On the DIY Earring Cards. |
.JPG) |
| Ready to ship :) - Actually already shipped |
Thursday, April 10, 2014
DIY Earring Cards
The idea started long time ago but it didn't materialise until recently. I kind of procrastinated over it and just can't decide on the design. Same as my DIY Light Box previously.
Was thinking if I keep doing this (the procrastinating part - I do this a lot!), it will never going to happen. The other day I got a bunch of order for stud earrings (post about them later) and decided to create this earring cards once and for all. It is not final as I am forever changing the layout and design in my head but good enough for now.
What do you think of my DIY Earring Cards?
 |
| WireBliss logo in front together with websites and email address. The white patch at the center of the purple card is double sided tape. You can use stapler as well. |
Here is the process involved.
I use Microsoft Word to create my cards as I am most familiar with it - use it everyday!
I use Microsoft Word to create my cards as I am most familiar with it - use it everyday!
Alternatively, you can also use Power Point, Excel, Google doc, etc. etc. whichever you are familiar with.
So, here goes:
- Create an image/design (jpeg file or any picture file) that you'd like to place at the front of your earring card. If you don't have one, you can leave it blank - which means you can skip this step.
- Since I have my logo in jpeg, I use that and added my website address below it.
- In a new Word document, create a table (or insert table).
- If you do not know how to create table in Word, google or check it out here - create table
- Depending on the card size you want, determine the number of column for the table.
- Mine is 5 columns and 4 rows (1 column x 4 rows represent 1 card). The purpose of multiple rows is for ease of adjusting the height.
- In the table, place the cursor at the spot where you would like to insert the image. Click on insert image, and look for the image you'd like to insert.
- Make adjustment to the column width and row height till you have your desired earring card size, print it out on a piece of thick paper (100 gm).
- I make the table borders visible so that I know where to cut and fold later on.
- Cut the cards along the borders as shown below.
- Use a needle to make 2 holes on each card and you are done.
If you have other ways of making earring cards, do share or leave me a comment.
Saturday, April 05, 2014
DIY Light Box (Easy)
I finally decided to make my own light box.
A very simple light box and you only need these three material:
- A rectangular white plastic storage container which is available at the supermarket. This one cost me RM40.
- A piece of A2 white paper (thats 8 times the size of A4 paper) folded into half and
- Sellotape
This is how my light box look like.
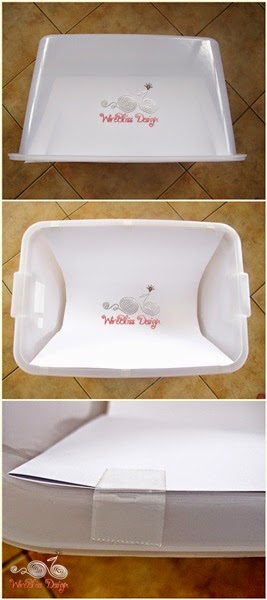 |
| It is very easy to set up really. |
 |
| Side view |
 |
| Tried it out under natural light in the kitchen |
 |
| and here is the result - unedited except added the water mark. |
Not bad yeah?
The picture is brighter on the top left compared to the bottom right though.
Will do better next time.
After all the light box is very mobile and light.
Hope you are inspired to make your own light box and have a great weekend :)
Wednesday, April 02, 2014
Yearly Event - Tomb Sweeping Day
Its the time of the year again. We celebrate this in early April every year.
This year's Ching Ming Festival or Chingming or Tomb Sweeping Day or Ancestors Day or Cheng Beng falls on the 5th of April. Wow! So many names to it ya.
Anyway, this is the day/time where we visit our ancestors grave sites, sweep, wash, clean, clear (grasses) and offer food, fruits, drinks (tea and wine) and paper money, paper clothing, paper bags, paper shoes, paper jewelries, paper handphone, etc. etc.
Like previous years, we always celebrate it a week earlier to avoid the traffic jam. As usual we came the day before to do the clearing and cleaning. The next day we brought the food and praying materials which will be burnt for the ancestors just before we leave. Here are some pics to give you some ideas of this celebration.
Click here for more on Ching Ming.
This year's Ching Ming Festival or Chingming or Tomb Sweeping Day or Ancestors Day or Cheng Beng falls on the 5th of April. Wow! So many names to it ya.
Anyway, this is the day/time where we visit our ancestors grave sites, sweep, wash, clean, clear (grasses) and offer food, fruits, drinks (tea and wine) and paper money, paper clothing, paper bags, paper shoes, paper jewelries, paper handphone, etc. etc.
Like previous years, we always celebrate it a week earlier to avoid the traffic jam. As usual we came the day before to do the clearing and cleaning. The next day we brought the food and praying materials which will be burnt for the ancestors just before we leave. Here are some pics to give you some ideas of this celebration.
 |
| We left early morning around 7:00 am but still got caught in the jam. Smoke in the background from burning of joss sticks and paper offerings. |
 |
| Still caught in the jam. Can't tell the difference between rows of cars and rows of tombs :) |
 |
| This is our "outing" spot. |
 |
| Food, fruits, rice, soup, wine, tea, kuih, noodles. All the favorite of the dear departed. |
 |
| This year we decided to bring the boys along. Their first time and its like a picnic. |
 |
| Hot hot day! |
 |
| While waiting for the dear departed to finished their meal. |
 |
| Panoramic view - about half of the cemetery. Click to enlarge. |
 |
| This is at Nirvana Memorial Park, near Bau. Looks like a park/garden. |
Sunday, March 23, 2014
Religious Parade - Shen Ong Kong (Diety) Birthday Celebration
We took the boys to the dieties' parade in celebration of the Shen Ong Kong's birthday last night.
Have a great weekend!
It was held downtown Kuching, along Jalan Padungan.
This celebration is held every year.
Since there are not many parade in Kuching, this is an opportunity not to be missed especially for the boys.
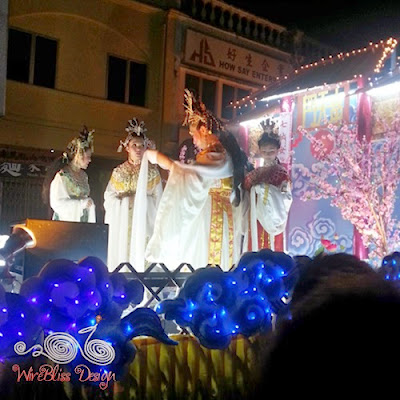
The parade was a showcase of decorated colourful floats, dragon and lion dances, beautiful princesses/performers, figures of deities on lorries, on four wheel drives, sedan chairs, etc.
Here are some of the photos to show you a part of our culture :)
Excuse the picture quality - taken with handphone camera.
 |
| One of the decorated cars |
 |
| One of the dragons |
 |
| Lion dance, praying |
 |
| Opps! Backsides only |
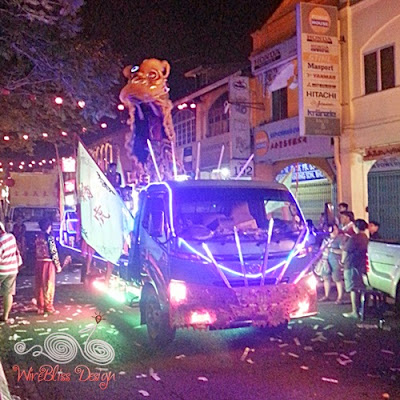 |
| This lion is performing on top of the truck |
 |
| Close up |
 |
| Happy lion :) |
 |
| Cute tricycle |
 |
| Diety on truck |
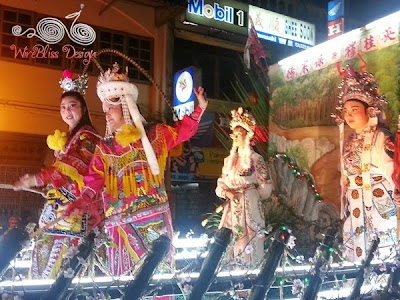 |
| Pretty performers and costumes |
 |
| From the 'underworld' |
 |
| From the 'underworld' Some seems to be under trance and looked very fierce |
 |
| Devotees and crowd following the parade while we the spectators lined the roadside |
Subscribe to:
Posts (Atom)


