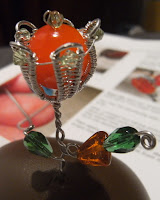
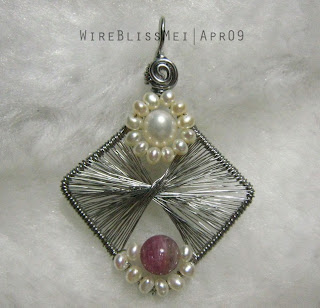
Emily did it again with the Wire Wrapped Tulips and Sparkly 'O' Studs!.
I don't need to describe or explain more. Just take a look at her pieces here.
Very well done Emily! Congratulations and thank you for sharing these pictures.


 Ligia from Portugal said "I would SO LOVE a Tulip Tutorial!!!!
:-))".
Then she got her tutorial few days ago. Now she is kind enough to share with us her wire wrapped Tulips.
Here is what Ligia has to say about the tutorial:
It was very easy to follow your tutorial, and especially the thing I always find hardest, you make it very simple, because you tell us exactly all the wire measures. In some tutorials we almost have to guess, but here it was excellent, and I didn't waste any wire, which is very important.
Thank you Ligia for sharing these! I am happiest when someone successfully completed a project based on my tutorials.
WireBlissMei
 The design for this wire wrapped tulip is one of a kind. The story behind this design started when a customer requested for a flower brooch back in Mid 2008 - First Tulip Brooch.
The rest is history as the saying goes :)
What's in this tutorial?
This tutorial teaches you how to create a One of a Kind Wire Wrapped Tulip with five (5) petals. Although you need to know the basic weaving technique, the pictorial instruction will guide you step by step until you successfully complete a tulip. Once finished, this tulip can be turned into a pendant, earrings or brooch. Its a good deal...hehe :)
Material and Tools?
You don't have to run to the store and purchase additional materials or tools if you are already a wire jeweler.
No special tools required.
Just the basic material and tools - wire and beads, round nose pliers, flat nose pliers, bend nose pliers, nylon jaw pliers and wire cutters and most important of all a dose of creativity and inspiration. Maybe a bit of patience...with the weaving :)
What are you waiting for? Go on to my etsy shop and check it out - click here and off you go. Thank you all for your continued support - not only for those who has been purchasing (and will be purchasing) but also those who only read my posts, glance through my posts and those who accidentally discover my blog and inspired.
Last but not least, thank you for leaving your comments here...that will make my day? Just be kind :)
WireBlissMei
 If you are from Malaysia, you would know that it is very difficult to find some of the essential tools for wire wrappers like us. It can be very very frustrating. And we would think twice, thrice...hmm..many many times before deciding to purchase online from other country.
One of these tools is the wire rounder or bur cup. I got mine last month from tooltime. Anyway, no regret and I love it! Only one thing though, it works very well with sterling silver but not stainless steel which is much harder. Guess I still have to use my old file with stainless steel wire.
Anyway, people asked me where I got mine. Unfortunately, tooltime didn't have this in stock anymore. I did a search at etsy and found two shops that has it. They are Nightstar and Romazone. Romazone only ships to Canada and US. Jenny Pong purchased hers from Singapore - Beads.etc. Looks cheaper but not sure about the shipping rate.
Another seller who carries it is Szarka - Magpie Gemstones, I love her gemstones and only discovered that she has it after I purchased mine :) - Opps! she didn't have it anymore! But you can always email her. She is very friendly.
So there you have it. Have a wonderful hols and weekend!
WireBlissMei
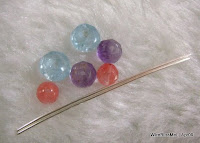
 Not much, just 2 pieces of 5in wire and beads of your choice.
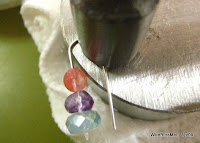
I used 3 beads for each side. The number of beads is up to you. Less beads, less wire :)
 Yeah! bend the wire all the way down. This is one big round nose pliers. Found it in hubby's toolbox...LOL...now unofficially mine.
 ....back to hammering, to harden the hook....I loooove hammering! Be careful! Don't hammer the beads.
 When done with hammering, use flat nose pliers to bend the hook ends this way. Bend about 0.5cm, about 45 degree.

 WireBlissMei