Showing posts with label z Stones and Tools. Show all posts

Sunday, April 24, 2022

Ongoing project

Lots of Wire Wrapped Beads

Been working on this for few weeks now
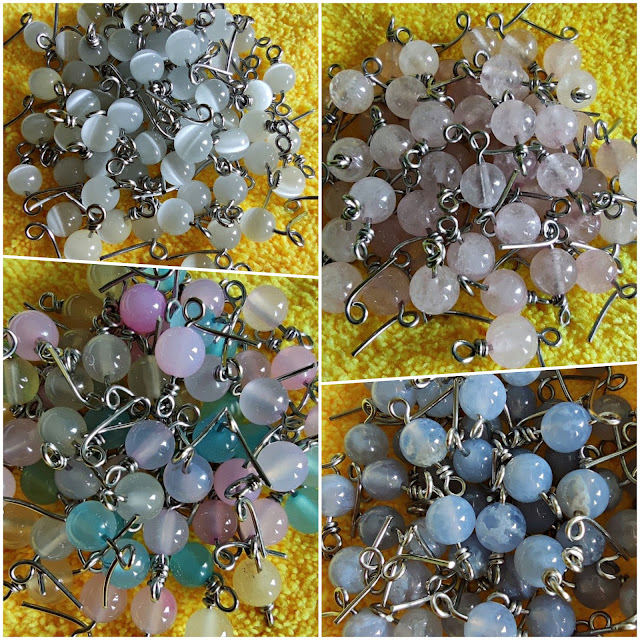
Wire wrapping lots of 6 mm gemstone beads for a new project - blood stones, agate, amazon, morganite, cat eyes, black lava stones and rose quartz
Another few weeks to complete them
Mean while, have great Sunday everyone.
Collection of wire wrapped gemstones beads in various colors

Collection of wire wrapped gemstones beads in various colors

Sunday, October 15, 2017

BIB Conference 2017 is Back in Kuching

The Borneo International Beads Conference 2017 is back.
It is currently held at Plaza Merdeka - a Shopping Mall + Hotel venue, right next to the previous venue - the Old Court House.

Actually went there yesterday after lunch but left without setting foot at the mall. The area was jam packed and we couldn't find any parking space. Disappointed!

So, this morning, we made it a point to leave an hour earlier, around 9 am. Just so that we can find parking space. Hais! Guess what?....We were not allowed to enter the Mall/hotel basement parking area before 10 am. Got such thing onekah???

Lucky us, we found a spot along the Main Bazaar. Phew!!
Off we went for a short sightseeing of the old bazaar area. This is the section of the city where we drive pass quite frequently but rarely stop to visit or shop.
If we do, only to a particular shop but not the whole stretch of the shops along this street.
This morning, we managed to take a peek at most shops - at least those that were already opened at 9++am.

Back to BIB, stalls were set up within the mall itself, therefore, it's way more comfortable with air-conditioning.

This year, however, I did not see any stall displaying beads from other countries. Most are locals. Not sure if it was because we were too early.

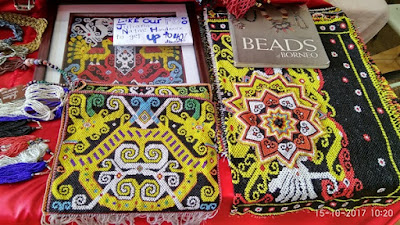
Here, let the pictures dothe talking.

Beads Abuzz Bazaar Plaza Merdeka Oct 2017 Kuching

Beads Abuzz Bazaar Plaza Merdeka Oct 2017 Kuching

Beads Abuzz Bazaar Plaza Merdeka Oct 2017 Kuching

Beads Abuzz Bazaar Plaza Merdeka Oct 2017 Kuching

Necklaces and handmade beads

Items made from used aluminium can

Recycled items turned into jewelry and other items

Beads Abuzz Bazaar Plaza Merdeka Oct 2017

Beads Abuzz Bazaar Plaza Merdeka Oct 2017

Beads Abuzz Bazaar Plaza Merdeka Oct 2017

Beads Abuzz Bazaar Plaza Merdeka Oct 2017

Beads Abuzz Bazaar Plaza Merdeka Oct 2017 Kuching

Beads Abuzz Bazaar Plaza Merdeka Oct 2017 Kuching

Beads Abuzz Bazaar Plaza Merdeka Oct 2017 Kuching

Beads Abuzz Bazaar Plaza Merdeka Oct 2017 Kuching

Beads Abuzz Bazaar Plaza Merdeka Oct 2017 Kuching

Beads Abuzz Bazaar Plaza Merdeka Oct 2017 Kuching

Beads Abuzz Bazaar Plaza Merdeka Oct 2017 Kuching

Beads Abuzz Bazaar Plaza Merdeka Oct 2017 Kuching

Beads Abuzz Bazaar Plaza Merdeka Oct 2017 Kuching

Beads Abuzz Bazaar Plaza Merdeka Oct 2017 Helping Hands Penan

Wednesday, May 06, 2015

No! No! No!....I Still Love You

No! No! No!
I have not forgotten you dear wires..
Just a bit neglected for a while..
All because I am busy with other matters..
You are still and always in my mind ❤ day and night シ
So, please bear with me and be patience as I shall be back soon.....

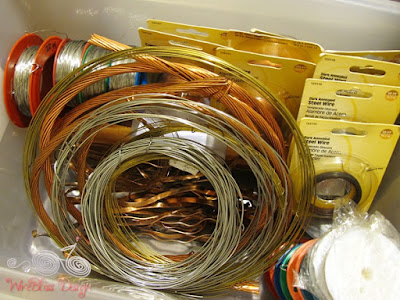
Lookie, I have been doing a bit of spring cleaning and most of you are in a more comfortable space...*wink* ✿smile✿ *happy*.
Copper and stainless steel wire collection

Copper steel wire collection

Excuse my mushy and cheeky post today as I really miss my wires.

Wednesday, June 25, 2014

4 Wire Wrapping Supplies That You Need to Get Started

Have you recently found your passion for wire wrap jewelry?
If you have lot of free time in your hands, try making some wire wrapping jewelry and create some unique one of a kind wire wrapped earrings, bracelets and rings that nobody has.
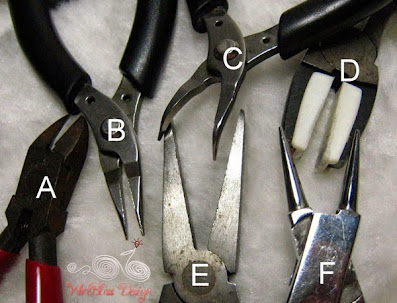
Before you get started, apart from the wire, the four basic types of pliers that you will need for a start are as follows:
  1. Wire cutter ('A' on the picture below): It is an essential supply for making wire wrap jewelry. This cutter allows you to cut and trim the wire of desired length. Buy the best quality cutter pliers to get neat edges to make professional looking jewelry.
  2. Chain nose ('B'): It is similar to the round nose pliers but here the inner edges of the jaws are flat. Thus, they are used for providing better grip and closing and opening the jump rings. This plier narrows towards the tip that makes them valuable to get into small space, like tuck in the wire end. To get perfection, ensure that the pliers’ inside edges are not serrated or else there will be mark on your wire. 
  3. Flat Nose ('E'): It is useful for bending and straightening the wire. This tool is used for a number of tasks when making earrings, bracelets, and pendants as it helps in holding the wire piece securely.
  4. Round Nose ('F'): For me, they are an absolute must to get control of the wire when you make loops of any size. They are even needed to make the spirals. To get large loops it is suggested to place the wire near the pliers’ handles and for making the smaller loops, place the wire at the pliers’ tip. Buy good quality pliers that have a return spring mechanism in the handle to ease the task as neat loops are an absolute must to make professional looking jewelry.
Wire wrap jewelry essential tools by WireBliss

These four supplies are not all; you also need a good instruction manual, book, magazine, ebook or search online for free tutorials that gives step-by-step instructions to make trendy and unique wire wrapping jewelry. There are many craft supply online stores that have a good collection of supplies to make wire wrap jewelry. But remember to look for coupons at Frugaa.com to the things at affordable prices.

Thursday, April 10, 2014

DIY Earring Cards

The idea started long time ago but it didn't materialise until recently. I kind of procrastinated over it and just can't decide on the design. Same as my DIY Light Box previously.

Was thinking if I keep doing this (the procrastinating part - I do this a lot!), it will never going to happen. The other day I got a bunch of order for stud earrings (post about them later) and decided to create this earring cards once and for all. It is not final as I am forever changing the layout and design in my head but good enough for now.

What do you think of my DIY Earring Cards?
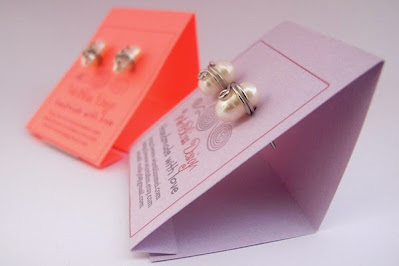
DIY Earring Cards by WireBliss
WireBliss logo in front together with websites and email address.
The white patch at the center of the purple card is double sided tape.
You can use stapler as well.
Here is the process involved.
I use Microsoft Word to create my cards as I am most familiar with it - use it everyday!
Alternatively, you can also use Power Point, Excel, Google doc, etc. etc. whichever you are familiar with. 
So, here goes:
  • Create an image/design (jpeg file or any picture file) that you'd like to place at the front of your earring card. If you don't have one, you can leave it blank - which means you can skip this step.
  • Since I have my logo in jpeg, I use that and added my website address below it.
  • In a new Word document, create a table (or insert table). 
  • If you do not know how to create table in Word, google or check it out here - create table 
  • Depending on the card size you want, determine the number of column for the table. 
  • Mine is 5 columns and 4 rows (1 column x 4 rows represent 1 card). The purpose of multiple rows is for ease of adjusting the height.
  • In the table, place the cursor at the spot where you would like to insert the image. Click on insert image, and look for the image you'd like to insert.
  • Make adjustment to the column width and row height till you have your desired earring card size, print it out on a piece of thick paper (100 gm).
  • I make the table borders visible so that I know where to cut and fold later on.
  • Cut the cards along the borders as shown below.
  • Use a needle to make 2 holes on each card and you are done.
Here is how my earring cards looks like + the measurement just to give you the idea - click on the pic to enlarge.
If you have other ways of making earring cards, do share or leave me a comment.
If you have suggestions or questions, do email or leave your comment here too.
DIY Earring Cards by WireBliss


DIY Earring Cards by WireBliss
Side view
That's all for today.

Saturday, April 05, 2014

DIY Light Box (Easy)

I finally decided to make my own light box.
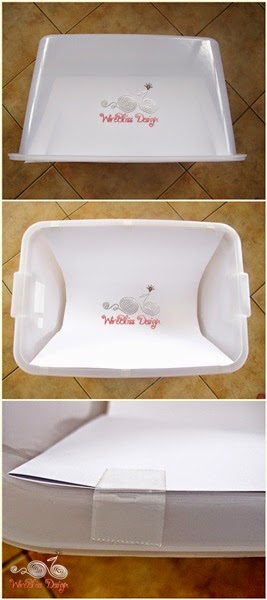
A very simple light box and you only need these three material:
  • A rectangular white plastic storage container which is available at the supermarket. This one cost me RM40.
  • A piece of A2 white paper (thats 8 times the size of A4 paper) folded into half and
  • Sellotape
This is how my light box look like.
DIY Light Box with Plastic Storage Container by WireBliss
It is very easy to set up really.

DIY Light Box with Plastic Storage Container by WireBliss
Side view
DIY Light Box with Plastic Storage Container by WireBliss - taking picture
Tried it out under natural light in the kitchen
Wire wrapped Swarovski Crystal Bracelets
and here is the result - unedited except added the water mark.
Not bad yeah?
The picture is brighter on the top left compared to the bottom right though.
Will do better next time.
After all the light box is very mobile and light.
Hope you are inspired to make your own light box and have a great weekend :)

Tuesday, February 04, 2014

Jewelry Storage

Now that I think about it, I actually never talk about this topic – jewelry storage.
Maybe because I do not have many finished jewelry ;)
That’s why I am more into storing stones and beads.
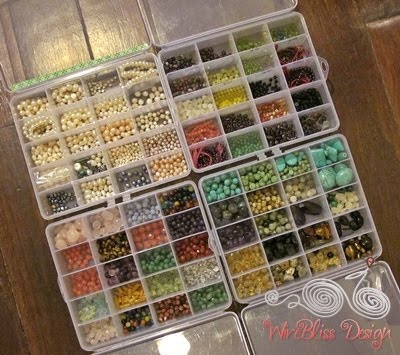
Storing stones and beads is not difficult. I mostly use plastic containers like these here.
Beads storage and collection

As for finished jewelry, people says it is an art in itself. Some use wine glasses to hang earrings, twist wires to make wire trees to hang necklaces and earrings (ehm! planning to do this), modify old picture frames into jewelry frames, and many many more ways depending on your creativity and of course budget and space.
Mine is quite simple here and rather "artless". I simply throw everything into this individual compartment here ;-)
Beads storage and collection
Psst! I hang some of my necklaces and rings on the clothes hooks too.
This way, I can just choose which one to put on when I change my clothes...for convenient sake.

Tuesday, December 03, 2013

The Chasing Hammer 2

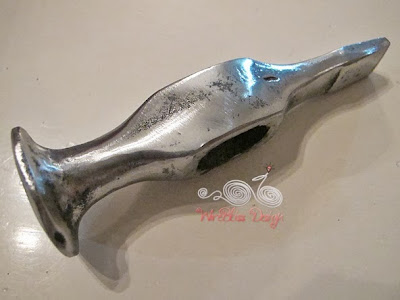
Then....I discovered this Chasing Hammer the other day.
As usual I can't resist and paid RM30 for it.
Another addition to my tools collection :)
Chasing hammer 2 - WireBliss
Brand new and shiny but the wooden handle is not as good as our handmade handle here- Chasing Hammer 1.

Chasing hammer 2 - WireBliss
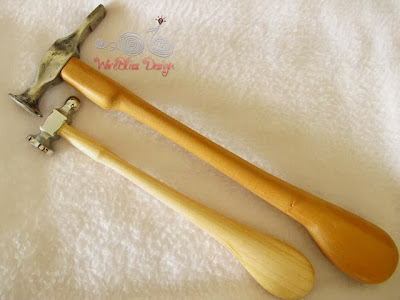
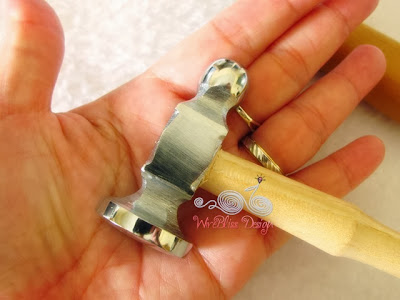
Side by side with Chasing Hammer 1.
Chasing Hammer 2 is tiny.
Big brother and little brother...hehe...

Chasing hammer 2 - WireBliss

Friday, November 29, 2013

The Chasing Hammer

Another addition to my tools collection.
I think this is a Chasing Hammer or is it goldsmith hammer?
Doesn't matter as long as I can use it to hammer the wires and metals.

Hubby found this one fine day at a second hand shop.
A very rare find for us on this side of the world :) So kasian.
Anyway, one fine weekend we set out to work on it and gave it a new body and a little bit of shine.
Actually it was over several weekends and evenings.
WireBliss- Chasing hammer found by hubby
It was all rusty and ugly when hubby brought it home.
The previous owner/s must have use it very productively.
Notice how worn out it is with all the kinks.

WireBliss-Chase hammer working on the handle
Found a piece of nice wood for the handle and we both set out to work on it, taking turns.
Tik tok! Tik Tok! Tok tok tok!.....

WireBliss-Chase hammer working on the handle, rounding up
Tok tok tok! Me, rounding up the handle.
Hardwork involved and not that easy especially to get a well rounded handle.

WireBliss-Chase hammer shining up
Then hubby gave it a bit of shine and this is how it turned out.
Not that shiny but way better than when it was brought home.

WireBliss-Chase hammer shining

WireBliss-Chase hammer done
After all the hard work, smooth and brand new although the flat face is not that flat.

WireBliss- Completed Chasing Hammer
This is the final product, all shiny and smooth.
Happy!

Sunday, April 08, 2012

How Many Round Beads on a 16" Strand?

Wonder no more.
The answer is between 34 to 203 beads, depending on the size of the beads of 2mm to 12 mm.
How big is a 2mm or 12mm beads? Well 2mm is tiny while 12mm is about the size of a peanut but this is only my guesstimate. To be exact, get the ruler or caliper.
Anyway, Szarka has a great article on the above at her site.
Head down to Magpie Gemstones and you shall find answers to these burning questions.
There are great conversion Charts by Dr. Karen Meador of Dreamcatcher Designs as well as Madeline Hoffman.
Here is a glimpse of the chart indicating the number of beads on a 16" Strand by Dr. Karen.
Chart indicating the number of beads on a 16" Strand

For bead strands of less than 16" i.e. 14" and 15", Madeline Hoffman has a chart workout for us.
For anything shorter, I guess we have to count manually....hehehe..just joking.
I actually do this sometimes...lol.

Thanks Szarka and Dr. Karen for sharing this informative article.

Happy Easter!

Thursday, February 09, 2012

The Most Important Tool of All in Wire Jewelry is....

...NOT this, thisthis, this, this, this or this!
It is the HAND and fingers.
Obviously, but always taken for granted.
I found this out the very very very very very painful way last Monday.
I slipped and fell on my butt outside the house due to slippery floor after the drizzle.
Hurt my hand while trying to cushion the fall and experienced the most excruciating throbbing pain.
Bum is ok (probably I got fat bum as cushion :) but look at my hand.
As if it is not bad enough, this is my right hand, my working hand.
I'd be out of the wire jewelry action for at least 2 or 3 weeks or maybe a month.
Can't hold the pliers anymore. 
Any pressure on that Mount of Venus will inflict pain...huhuhu...

WireBliss most important tool got injured

Lesson learned:
  • Be extra careful when walking or running on wet floor.
  • Don't rush, walk slowly.
  • Wear slippers/shoes with good rubber sole (mine is botak - bald)
  • Listen to dear hubby! :) don't be stubborn! When he says "don't do" then he may have the premonition...the story - I insisted on making a small rack (carpentry) although he was against it. The fall happened when I went to the back to look for the last piece of aluminium. In the end, hubby finished off the little rack.
  • Anymore safety tips? I you have, feel free to share in the comment.
There you are.
No matter what, Hand is not the only important tool.
The eyes, ears, nose, feet, teeth, etc. are all important.
So, do take care.

Saturday, December 18, 2010

Murano Bracelet and Car Service

So here I am, at Toyota Service Center waiting for my car.
I have another 2 hours to kill but it will not be a boring 2 hours with internet access, comfortable sitting area and a small table all for myself. With free breakfast, perfect!
Haha! Just joking! Here's a peek of the place.
Pic on the left is on my right hand side - registration area, while pic on the right is in front of me - waiting area.
Back to jewelry, here is a recently completed bracelet. A simple wire wrapped Murano Bracelet for Marcia.
It goes very well with her dress but I didn't get to snap pictures of her wearing both in their rush to a wedding dinner last night. But it really matches her dress!!! Next time maybe.
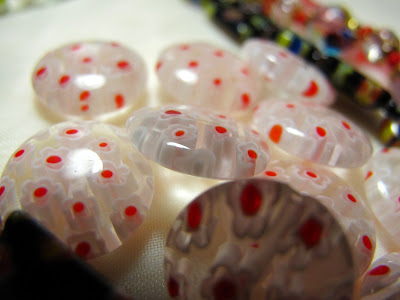
simple wire wrapped Murano (round with red dots) Bracelet
simple wire wrapped Murano (round with red dots) Bracelet with charms
Added some "LingLingLongLong!" (my interpretation of charms) to give it a bit of...well..charms :)
I love those long straight flattened wires. I was going all out hammering them. Ok, exaggerated a bit there :)
Somehow hammering makes me....hmmm....rather happy. Why is that I wonder?
Maybe I am imagining hammering something else or someone else...LOL...
pandora style beads white with red dots
I was actually at the local bead shop looking for pandora style beads but this one caught my eyes immediately, and I was "Hey! this matches Marcia's dress!!". Get it!!
A pair of matching earrings is next but that will be for later today.
Hopefully we don't have other plans for the day and I don't get distracted.
Seems like this is happening a lot these days - distractions! Those unplanned ones especially.

Anyway, while we are still with Murano beads, here are some of my collection.
I have more actually (show off!!!) but I didn't dig deeper into my chest of treasures last night..hehehe.., so these are the easy to reach ones only.
colorful murano beads
The glassy and black ones as well as the murano pendants (top left corner, orange and white - sorry! I missed taking a good shot at that one. Must have been sleepy!) are gift from Ahmi. She got them when she was in Europe and they are for keepsake. They are awesome glass beads.
Sometimes, I got lost staring at and within them and wonder how they are made and who are the artists producing them.
That's all for now and I wish all of you a happy and productive weekend.